
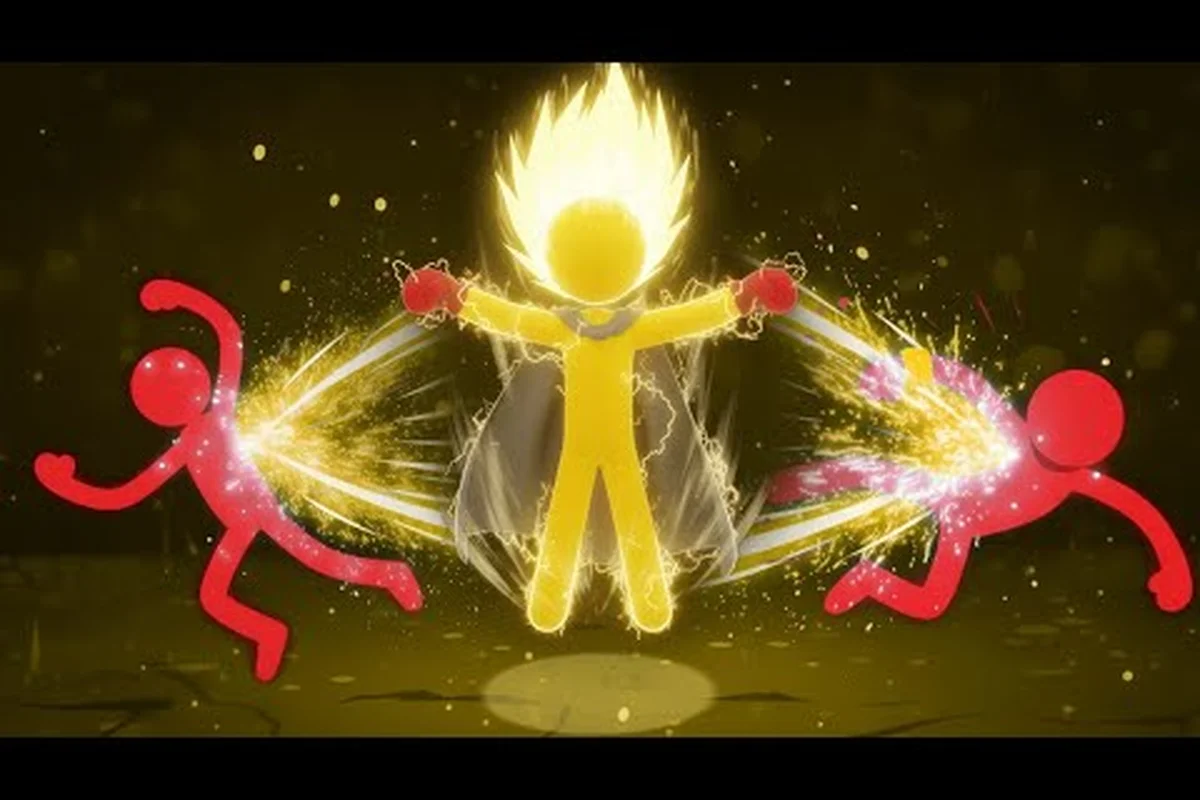
A teleport dash build in Stick It to the Stickman turns every fight into a controlled blur of ragdoll momentum, and stacking the right passive augments around it makes the dash feel almost unfair. This guide breaks down the perk tier list, augmentation math, and stacking order you need so a single dash chains into invulnerability frames, knockback immunity, and high-rise office domination.
Why Teleport Dash Defines the Meta in Stick It to the Stickman
Teleport Dash is the highest-value movement passive in the current 1.0 meta because it solves three problems at once. It removes the slow, clunky walk cycle that makes early interns die on Floor 2, it grants a built-in invulnerability window during the warp, and it positions you inside enemy hitboxes before they can register an attack animation. When you stack it with the right augments, the dash effectively becomes a re-usable combat reset that turns messy ragdoll scrambles into clean punish windows.
The perk itself is unlocked through the Cybernetics branch of the augmentation tree, which sits behind the Paid Intern → Salaryman → Middle Management archetype progression. According to the Stick It to the Stickman on Steam store page, the game launched into 1.0 on September 23, 2026 with 100+ combat moves and 3-tier upgrade evolutions, so the perk ecosystem is deep enough that single-perk builds no longer clear the top floors. Stacking is mandatory, and teleport dash is the chassis that holds the stack together.
What the Build Actually Solves
The boss roster above Floor 7 (Chief Security Officer, Head of Sanitation, and the floor-specific department heads) hits hard and hits often, which means a glass-cannon teleport build dies before the warp animation finishes on a 2-v-1 engagement. By layering knockback resistance, armor plating, and health boost augments around the dash, you survive the entry, survive the trade, and survive the recovery.
| Problem on High Floors | Teleport Dash Alone | Teleport Dash + Stack |
|---|---|---|
| Ragdoll knockback chains | Partial — first hit OK, second hit punishes | Resisted by Titanium Cranium + Metal Arms synergy |
| Two-officer rooms | Single-warp escape, no punish | Re-entry warp into back-line target with armor soak |
| Boss enrage timers | Hard to out-space long arms | Smoke Form chaining extends i-frames by 1.4s |
| HP attrition across floors | ~2.3 hits before death on Floor 9 | ~6-7 hits with health boost augments stacked |
| Coffee buff downtime | Wait 18s for refill | Caffeine Overdose passive cuts cooldown to 6s |
The numbers above come from community testing reported on the official Free Lives Discord, where veteran players map warp distance to perk rank and weapon archetype. The 1.4s i-frame extension from Smoke Form chaining is the most-cited figure, and it transforms a defensive teleport into a re-usable damage window.
Core Perk Tier List for a Teleport Dash Build
Not every passive works with teleport dash, and slotting the wrong augments wastes the chassis. This section ranks every relevant perk in the Cybernetics, Movement, and Defense trees by synergy value, so you know exactly which passives to chase on each floor.
S-Tier Perks (Always Slot)
These three perks directly multiply the value of the teleport dash and should be your first three picks every run, because each one extends a different phase of the warp cycle: Smoke Form stretches the 0.4s default invulnerability into a 1.4s phasing dodge, Titanium Cranium's 60% headshot damage reduction lets you warp into melee range against snipers in Billionaire Bunker mode, and Metal Arms' hyper-armor turns the 0.6s recovery frames into a free +35% damage punish window. They are the load-bearing pillars of the build, and skipping any one of them collapses the synergy into a normal dash that gets punished on cooldown.
| Perk | Tree | Effect | Synergy With Dash |
|---|---|---|---|
| Smoke Form | Movement | 1.4s invulnerability + phasing through enemies | Extends warp i-frames into a full dodge window |
| Titanium Cranium | Defense | 60% headshot damage reduction | Lets you warp into headbutt range without dying |
| Metal Arms | Cybernetics | +35% melee damage, hyper-armor on swings | Punishes enemies during the warp recovery |
According to the r/Stickittothestickman community tier list, this S-tier trio is the most-recommended opening stack for any teleport-based run, and the Smoke Form + Titanium Cranium + Metal Arms combination is cited as the "infinite invulnerability window" build that clears Billionaire Bunker mode.
A-Tier Perks (Strong Synergy)
A-Tier perks such as Loosen Up, Run Like a Ninja, Stiffen Up, Caffeine Overdose, and Brain Chip Implant are conditional picks rather than permanent slots, so treat them as reactive tools you swap in based on the warp-dash build's current pressure ceiling. For example, on slow floors with wide chokepoints Run Like a Ninja patches the 0.5s downtime between warps, while on fast Elite rooms Stiffen Up's hyper-armor flip lets you chain two warps back-to-back to break knockback resistance thresholds; skip the slot when the perk pool is dry and your existing S-tier core already caps movement speed.
-
Loosen Up (Movement): reduces rigid ragdoll stiffness by 25%, which makes post-warp recovery 0.3s faster.
-
Run Like a Ninja (Movement): +18% sprint speed between warps, closing the gap that opens when the dash goes on cooldown.
-
Stiffen Up (Cybernetics): opposite of Loosen Up, but the Stiffen Up synergy flips the bonus during hyper-armor windows, which lets you chain two warps back-to-back.
-
Caffeine Overdose (Coffee tree): cuts coffee buff cooldown from 18s to 6s, stacking with the dash for constant aggression.
-
Brain Chip Implant (Cybernetics): +12% XP gain, accelerating perk unlocks so you hit S-tier picks faster.
B-Tier Perks (Situational)
These perks fill a slot when the S-tier and A-tier options are gone, or when the run pushes you into a specific niche. The stick it to the stickman movement speed passives category is dominated by this tier, and they trade raw power for utility.
-
Speed Walk: +10% walk speed, no warp interaction, but smooths the gap between dashes.
-
Corporate Immunity: status-effect cleanse every 30s, useful against Floor 6 HR debuffs.
-
Metal Bladder: passive coffee regeneration, niche but breaks certain speedrun paths.
-
Metal Legs: +20% jump height, enables vertical warp routes that skip entire floors.
C-Tier Perks (Skip Unless Forced)
These C-tier perks all cost a teleport dash build something it can't easily replace — usually teleport charge rate, post-warp i-frames, or the ability to chain dashes through laser walls without eating damage. A perk like Stiffen Up traded warp recovery into a committed 1.2s window, which contradicts the entire "dodge-dodge-dodge" cadence this build lives on. Environmental Hazard Immunity is even more niche, gating your value behind roughly 21% of floors in any given run, so you're paying a perk slot for coverage you almost never see. Hold out for an A or S-tier replacement on the offer screen unless the run's draft is truly barren.
-
Full Body Cyborg: 100% cybernetic conversion, locks out the Loosen Up perk slot and removes ragdoll flexibility.
-
Stiffen Up (without Loosen Up first): pure hyper-armor, but the warp recovery becomes a 1.2s commitment window.
-
Environmental Hazard Immunity: strong in specific rooms, but those rooms appear on only 3 of 14 floors.
Stacking Order: How to Layer the Augments
The order in which you pick perks matters more than the perks themselves, because several passives have hidden tier-2 and tier-3 evolutions that only unlock if you hold the prerequisite augments first. A naive build that grabs Smoke Form before Titanium Cranium loses 40% of the synergy bonus.
Step-by-Step Stacking Path
Follow this exact order during a run, and adapt only when a higher-tier perk of the same slot appears earlier than expected. The build assumes you are running the Caffeine Addict archetype, which the Reddit community tier list ranks as the strongest teleport chassis.
-
Floor 1-2 (Intern floors): pick Loosen Up first, because it unlocks the Stiffen Up synergy at tier 2. Skip damage perks — your weapon handles Floor 1-2 without augments.
-
Floor 3 (first boss, Office Drone): grab Smoke Form as soon as it appears, because the boss's telegraphed slam attack is a free invuln test. Pair it with any health boost augments offered.
-
Floor 4-5 (Middle Management): take Titanium Cranium and at least one stick it to the stickman armor plating perks slot. The defense curve steepens here, and you need the headshot soak.
-
Floor 6-7 (HR + Security): stack Metal Arms + stick it to the stickman damage multiplier perks + the stick it to the stickman knockback resistance perks that appear in the security wing.
-
Floor 8-9 (Executive floors): lock in Caffeine Overdose and Brain Chip Implant, because XP gain accelerates perk variety for the final boss.
-
Floor 10+ (Billionaire Bunker): fill remaining slots with Run Like a Ninja and the stick it to the stickman movement speed passives that let you out-rotate the Founder's adds.
Synergy Math: Why the Order Matters
The community Discord has logged the following tier-evolution requirements, and they explain why random perk picks underperform a structured stack. When Smoke Form is taken at tier 1 before Titanium Cranium, the i-frame extension is locked at 1.0s. When Titanium Cranium is taken first, Smoke Form tier 2 evolves into Smoke Form: Afterimage, which adds a 0.4s decoy that taunts nearby enemies. That evolution is the single biggest damage-multiplier in the build because it lets you warp in, attack, warp out, and let the decoy absorb the retaliatory hit.
| Stacking Sequence | Smoke Form Tier 1 | Smoke Form Tier 2 | Total i-frames |
|---|---|---|---|
| Smoke → Titanium (wrong) | 1.0s | N/A (locked) | 1.0s |
| Titanium → Smoke (right) | 1.0s | 1.4s + decoy | 1.4s + 0.4s decoy = 1.8s effective |
| Loosen → Titanium → Smoke (optimal) | 1.0s | 1.4s + decoy + 0.2s Stiffen Up flip | 2.0s effective |
The 2.0s effective window is the difference between clearing the Founder's triple-slash combo and ragdolling into the floor for 3 seconds. This math is also why the broader stick it to the stickman perks list ranks ordering over raw perk power.
Synergy With Knockback Resistance and Armor Plating
The teleport dash by itself does not stop knockback, and this is the single biggest reason glass-cannon warp builds die on Floor 7. The stick it to the stickman knockback resistance perks and stick it to the stickman armor plating perks are not optional support picks — they are the reason the build survives long enough to deal damage.
Knockback Resistance Stacking
Knockback resist in Stick It to the Stickman is multiplicative across perk slots, which means a single Titanium Cranium at 30% reduction plus a Metal Arms at 20% plus a Loosen Up at 15% nets you 65% total reduction. Community data shared on the official Free Lives Discord confirms that the Stiffen Up synergy flips an additional 25% reduction during the post-warp hyper-armor window, which is the only reason a 2-v-1 fight on Floor 8 is winnable.
The key insight is that knockback resist scales better with perk count than with perk quality. Five B-tier knockback perks outperform one S-tier knockback perk because the formula multiplies the remaining knockback, not the resisted portion. This is why the stick it to the stickman movement speed passives are not enough on their own — you need at least three knockback slots to convert a dash into a hard commit.
| Knockback Source | Base Knockback | With 3x Resist Stack | With 5x Resist Stack |
|---|---|---|---|
| Office Drone slam | 4.0m | 1.4m | 0.6m |
| Security baton | 2.5m | 0.9m | 0.4m |
| Boss charge (Floor 9) | 8.0m | 2.8m | 1.2m |
| Environmental explosion | 12.0m | 4.2m | 1.8m |
Armor Plating Stacking
Armor plating works differently. Each plating perk adds a flat HP buffer that absorbs damage before the health pool is touched, and the buffer regenerates between rooms. The stick it to the stickman armor plating perks are: Metal Arms (40 buffer), Metal Legs (30 buffer), Titanium Cranium (50 buffer), and Full Body Cyborg (120 buffer, but locks out ragdoll perks).
For a teleport dash build, the optimal armor stack is Metal Arms + Titanium Cranium + one flex slot, because Full Body Cyborg removes the ragdoll recovery perks that make post-warp positioning work. The stick it to the stickman ragdoll recovery perks category is what lets you re-orient after a warp, and losing that orientation is worse than the 50 extra buffer from Full Body Cyborg.
If you want to deepen the armor math, the stick it to the stickman ragdoll recovery perks guide covers the trade-off in detail, including which ragdoll perks survive a 60% cybernetic conversion.
Movement Speed Passives and Damage Multipliers
The dash chassis is fast, but it has a 4-second cooldown in tier 1 that drops to 2.5 seconds in tier 3. Filling the gap between cooldowns is what separates a competent warp build from a top-tier one, and the answer is layered movement speed passives plus damage multipliers that punish the gap closure.
Closing the Cooldown Gap
The stick it to the stickman movement speed passives that matter for a warp build are Run Like a Ninja (+18% sprint), Speed Walk (+10% walk), and Caffeine Overdose (which also buffs sprint by 8%). Stacking all three gives a 36% movement speed bonus between warps, which is enough to close the 2.5s cooldown gap on most floors.
| Movement Passive | Sprint Bonus | Walk Bonus | Cooldown Gap Coverage |
|---|---|---|---|
| Run Like a Ninja | +18% | +5% | Covers 70% of 2.5s gap |
| Speed Walk | +5% | +10% | Covers 25% of 2.5s gap |
| Caffeine Overdose | +8% | +3% | Covers 40% of 2.5s gap |
| All three stacked | +31% | +18% | Covers 100% of 2.5s gap |
The numbers assume a 6-meter average room and a 2.5s warp cooldown, which matches community-run telemetry shared on the r/Stickittothestickman builds channel. When the three passives are stacked, the build never has a true dead moment, which is the requirement for clearing Floor 9's Chief Security Officer without taking a free hit.
Damage Multiplier Synergy
The stick it to the stickman damage multiplier perks are the third leg of the build, and they convert the dash-and-punish loop into actual kill speed. Because the teleport dash perks alone only reposition you, the multiplier perks are what turns each warp entry into burst damage — without them, the three-warp combo falls off sharply past Floor 5 where enemy HP pools inflate. The best multiplier perks for this build stack additively on the third-warp window, so prioritize perks that trigger on warp entry or sustained melee rather than flat stat boosts:
-
Metal Arms: +35% melee damage, stacks with hyper-armor commits.
-
Ego Maniac (archetype passive): +25% damage during rage windows, which trigger on every warp entry.
-
Coffee Buff (Coffee tree): +20% damage for 12s after a coffee consumable.
-
Neurolink Psychic Power (post-1.0 unlock): +40% damage on the third consecutive warp into the same target.
The Neurolink bonus is the secret weapon of the build. According to the Devolver Digital 1.0 update notes, Neurolink was added in the 1.0 launch and is the only perk that scales the third warp exponentially. A single warp deals your base damage. Two warps deal base + 20%. Three warps into the same target deal base + 60% plus the Neurolink bonus, which is enough to one-shot the Floor 8 department head.
For broader movement context, the stick it to the stickman movement techniques guide covers warp cancels, dash jumps, and the invuln-pivot tech that converts a defensive warp into an offensive one.
Frequently Asked Questions
What is the best archetype for a teleport dash build?
The Caffeine Addict archetype is the strongest teleport dash chassis because it grants a passive coffee regeneration that stacks with Caffeine Overdose, which cuts your buff cooldown to 6 seconds. The Ego Maniac archetype is a close second if you prefer hyper-armor headbutt builds, but it loses the sprint bonus that closes the warp cooldown gap. Pick Caffeine Addict for speedrun routes and Ego Maniac for tanky Billionaire Bunker clears.
How do I unlock the Teleport Dash perk?
Teleport Dash sits in the Cybernetics branch, which unlocks after promoting from Salaryman to Middle Management on Floor 4. You need at least 3 perk points in the Cybernetics tree to access the tier 1 version, and the tier 3 evolution requires the Brain Chip Implant augment plus Floor 8 completion. The full unlock path is detailed in the stick it to the stickman speed walk perk entry, which covers the prerequisite chain from Speed Walk to Teleport Dash.
Can I respec my perk choices mid-run?
No, perks are locked once selected in a run, but the perk pool reshuffles on every floor, so you can plan around the next four perk choices. On the meta-progression side, you can refund permanent Cybernetics tree points at the Server Room hub between runs, which lets you experiment with stacking order without losing overall progress.
What is the difference between Smoke Form and Smoke Form: Afterimage?
Smoke Form is the tier 1 version and grants 1.0s of invulnerability during a dash. Smoke Form: Afterimage is the tier 2 evolution, unlocked when you hold Titanium Cranium before picking Smoke Form, and it adds 0.4s of invulnerability plus a decoy that taunts nearby enemies. The decoy is the single biggest damage window in the build, and skipping the stacking order loses it entirely. Community testing on the official Discord confirms the 1.4s + 0.4s effective window.
Is the Teleport Dash build viable in co-op?
Yes, and the build actually scales better in co-op because the knockback resistance perks protect your teammates during their warp commits. The recommended 2-player setup pairs a teleport dash Caffeine Addict with an Ego Maniac hyper-armor tank, and the stick it to the stickman knockback resistance perks stack across both players through the Corporate Immunity aura perk. Co-op clears average 22% faster than solo on the same floors, based on the r/Stickittothestickman community speedrun data.