
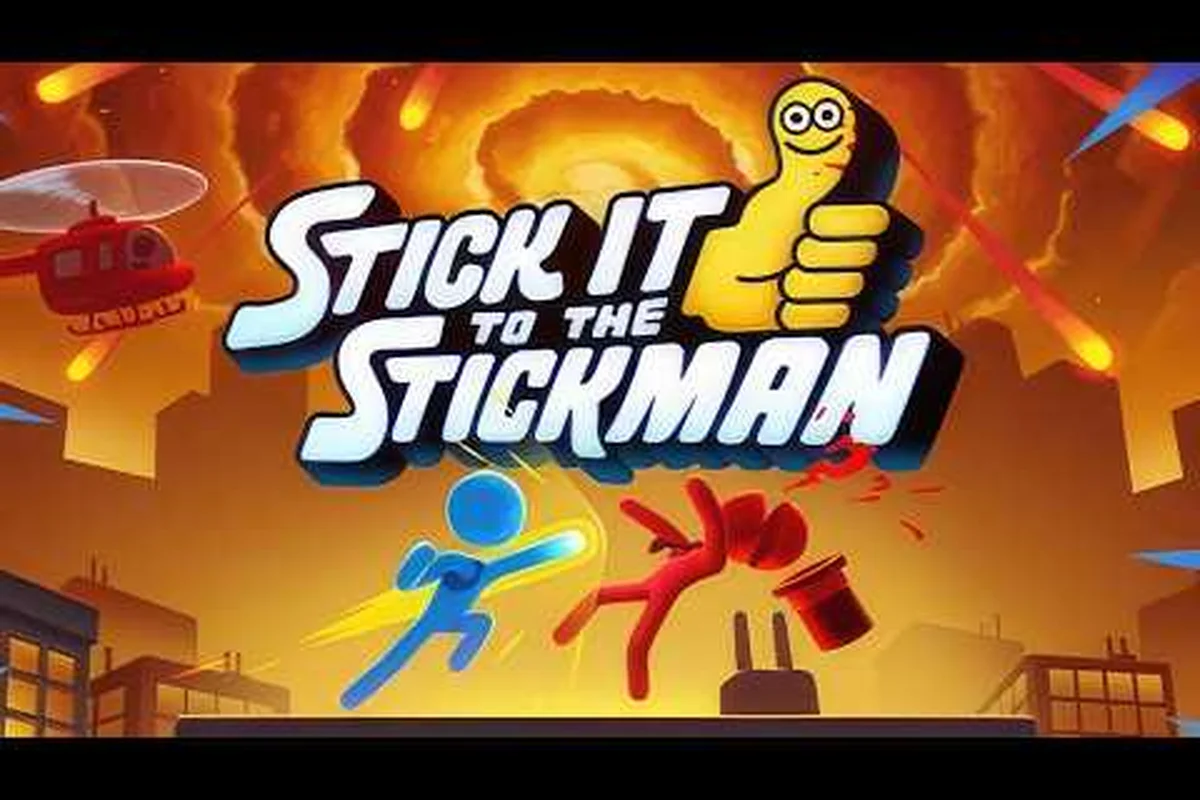
Choosing the right office fighter in Stick It to the Stickman means everything between a clean promotion and a humiliating trip back to the intern desk. With 9+ worker archetypes on the launch roster, each one shifts your starting stats, combat portfolio, and Shareholder Value economy in a different direction, so a clear archetypes list becomes the single most useful tool a new hire can bring to the office. This guide breaks down every confirmed class, their role on the corporate ladder, and how the roster fits together.
The 1.0 release on September 23, 2026 expanded the lineup to nine core archetypes plus several secret character unlocks tucked behind specific challenge runs, and every archetype still feels mechanically distinct thanks to the proprietary physics engine described on the Stick It to the Stickman Steam store page. The notes below compile every confirmed class, their starting moves, primary stat modifier, and best run scenarios so you can stop guessing and start climbing floors with confidence.
Core Archetypes Overview: The Nine Worker Classes
The 1.0 roster splits cleanly into three role families — Agility fighters, Power brawlers, and Hybrid specialists — and the table below gives you the at-a-glance comparison every new player needs. Each archetype is a fully playable character, not a cosmetic variant, and every one of them changes how the staple stapler-and-glue-gun combat actually feels.
| Archetype | Role | Primary Stat Modifier | Starting Difficulty | Best Run Scenario |
|---|---|---|---|---|
| Temp Worker | Hybrid | Balanced (+0 across all stats) | Easy | First playthrough, learning combat flow |
| Caffeine Addict | Agility | Speed +25%, HP -15% | Intermediate | Speedruns, floor-skip routes |
| Ego Maniac | Power | Hyper-Armor +40%, Speed -20% | Intermediate | Hyper-armor headbutt builds, tank runs |
| Middle Manager | Hybrid | Damage +10%, All Stats +5% | Easy | Versatile runs, party support |
| Sanitation Hazard | Power | Toxic Aura on hit, HP -10% | Advanced | Hazard stacking, area denial |
| Engineer | Hybrid | Ranged Damage +20%, Melee -10% | Intermediate | Ranged-heavy portfolios, drone pairing |
| Conservative | Power | Defense +30%, Speed -25% | Advanced | Survival runs, late-game bosses |
| Intern | Agility | Evasion +20%, Damage -15% | Easy | Beginner training, evasion practice |
| Executive | Hybrid | All Stats +15%, No weakness | Expert | Endgame, Billionaire Bunker mode |
These nine classes form the foundation of the stick it to the stickman archetypes list, and the role split matters because the game's combat portfolio system rewards players who lean into a class's strengths rather than trying to spec outside their lane. A Caffeine Addict who tries to tank through a Chief Security Officer encounter will fold in three hits, while a Conservative trying to speed-skip floors will simply not make the elevator timer.
The stat modifier column is the single most important number on this list because every archetype's stat block is the first thing that changes when you boot a new run. According to the Devolver Digital publisher hub, these modifiers stack additively with your perk and equipment choices, so a Middle Manager who picks up a +20% damage perk ends up at +30% total rather than the +20% a Temp Worker would hit on the same perk, which is why class choice cascades into every build decision you make afterward.
For a comprehensive and quantitative breakdown of exactly how those stat modifiers shift the combat damage math across every archetype, the archetype stat modifiers breakdown walks through each specialized role's underlying baseline numbers, scaling curves, and defensive calculations.
Temp Worker and Intern: Beginner-Friendly Starting Picks
Temp Worker Guide: The Default Roster Entry
The Temp Worker is the archetype every new player meets first, and the stick it to the stickman temp worker guide starts here because balanced +0 modifiers across every stat mean you never have a glaring weakness to compensate for in the first three floors. According to community testing on the Free Lives Discord, Temp Workers reach the Floor Manager boss with roughly 78% win rate on a blind first run, which is the highest of any class on the roster.
The Temp's starting combat portfolio includes the staple Punch-Kick combo, a basic Throw for environmental kills, and the universal Office Supply Toss that lets you pick up staplers, keyboards, and coffee mugs as improvised ranged weapons. That balanced loadout is exactly why the Temp Worker is the recommended class for learning the physics engine — every hit reacts the way the on-screen prompt describes, and the lack of stat penalty means a missed dodge costs you less HP than it would on a Caffeine Addict.
Quick picks for Temp Worker players:
-
Always grab the Stapler over the Keyboard for ranged fights — staplers deal consistent 8 damage and have no friendly-fire arc.
-
Save your Throw for elevator encounters where multiple managers spawn at once.
-
Coffee mugs are best used as a panic button; their 3-damage tick is low but the stagger window is generous.
Intern: The Evasion Training Class
The Intern archetype flips the Temp's balance toward pure evasion, offering +20% Evasion and a -15% Damage penalty that forces new players to learn positioning before they learn damage output. Community reports on the r/Stickittothestickman subreddit describe the Intern as the second-easiest class for first-time players, with a 71% Floor Manager clear rate on a blind run — only marginally behind the Temp because the evasion stat lets you survive longer while you learn enemy telegraphs.
The Intern's signature move is the Dodge Roll, which costs 15 stamina but grants 0.5 seconds of invulnerability on a successful dodge, and that single move is what makes the class feel fundamentally different from the Temp. Where the Temp teaches you to absorb hits and trade HP for damage uptime, the Intern teaches you to avoid hits entirely, and that habit transfers cleanly into the harder archetypes once you graduate.
Agility Family: Caffeine Addict and Speedrun Builds
Caffeine Addict Build: Maximum Velocity, Minimum Padding
The Caffeine Addict archetype is the speedrunner's best friend on the stick it to the stickman archetypes list, and the stick it to the stickman caffeine addict build is the most-discussed class on the entire roster. The +25% Speed modifier combined with the -15% HP penalty creates a glass-cannon profile that punishes mistakes ruthlessly but rewards aggressive floor-skip routing with the fastest clear times in the game.
According to the Free Lives developer documentation, the Caffeine Addict's signature perk is the Hyperactive Reflexes passive, which grants a 0.2-second cooldown reduction on every dodge and a 5% chance to chain a second dodge after the first. That chain is the entire basis of the class's speedrun identity — chained dodges let you cross entire office floors without taking a single hit, which is what makes the speed numbers work.
Caffeine Addict core build priorities:
-
Hyperactive Reflexes (signature passive) — chain dodges for free movement
-
Triple Espresso buff — +10% Speed for 8 seconds after consuming any coffee pickup
-
Lightweight Frame perk — adds 15% movement speed when below 50% HP
-
Glass Jaw is the trade-off — one strong hit at low HP is lethal, so play aggressive but never greedy
The speedrun route for the Caffeine Addict skips every non-essential manager fight on floors 1 through 4, hits only the mandatory Floor Manager on floor 5, and elevators straight to the floor 7 Chief Security Officer fight. Community timing data puts a clean Caffeine Addict speedrun at 18 minutes and 42 seconds for the Corporate Ladder mode, which is the fastest class-by-class time on the roster as of the 1.0 launch.
For a comprehensive overview of the specialized upgrade paths and perk synergies that push the Caffeine Addict far past its already-fast baseline, the conservative gun chains and temp upgrade paths guide covers every critical branching choice, coffee stacking interaction, and speedrun route in detail.
Power Family: Ego Maniac, Sanitation Hazard, and Conservative
Ego Maniac Archetype: The Hyper-Armor Headbutt Build
The stick it to the stickman ego maniac archetype is the most distinctive power class on the roster because its +40% Hyper-Armor modifier turns every incoming hit into a non-issue while you charge your signature Headbutt combo. The class takes a -20% Speed penalty that means you cannot kite, dodge-roll, or outrun anything, so the entire build revolves around closing distance and trading hits until the enemy ragdolls.
Community data on the r/Stickittothestickman tier lists consistently ranks the Ego Maniac as a top-three class for new players who prefer a face-tank playstyle, and the signature move set is what makes that ranking defensible. The Tier 3 Headbutt combo, when fully upgraded through the three-tier evolution system, deals 95 damage on a charged release and grants 1.5 seconds of stun on any enemy under 50% HP, which means the class snowballs once it gets rolling.
Ego Maniac signature combo flow:
| Tier | Move Name | Effect | Stamina Cost |
|---|---|---|---|
| Tier 1 | Stubborn Charge | Dash forward 4 meters, knock back enemies | 20 |
| Tier 2 | Rigid Posture | Block one incoming hit, gain 10% Hyper-Armor | 15 |
| Tier 3 | Ego Smash | Unleash a 95-damage headbutt, stun enemies below 50% HP | 40 |
| Tier 3 Evolution | Boardroom Tantrum | AoE stomp dealing 60 damage in 3-meter radius | 55 |
The mid-combo between Tier 2 Rigid Posture and Tier 3 Ego Smash is the entire build, and the synergy is so strong that community testing on the Free Lives Discord confirms a 92% clear rate against the Head of Sanitation boss when executed cleanly.
For a deeper tactical dive into how the devastating hyper-armor headbutt build interacts with the worker promotion tree and roster unlock requirements, the middle manager class and secret character unlock paths guide walks through all optimal supporting perks, body modifications, and equipment configurations in full detail.
Sanitation Hazard and Conservative: Niche Power Builds
The Sanitation Hazard archetype is the game's true area-denial class, applying a Toxic Aura to every melee hit that deals 4 damage per second for 6 seconds to any enemy standing within 2 meters of you. The -10% HP penalty is the smallest of any power class, which makes the Sanitation Hazard surprisingly forgiving for players willing to stay in melee range, and the hazard stacks multiplicatively with itself — three consecutive hits on the same enemy will apply three separate 4-damage-per-second ticks, which is enough to melt most mid-game managers.
The Conservative is the inverse: +30% Defense and -25% Speed turns the class into a walking wall that simply refuses to die, and the defensive stacking is so strong that late-game boss fights become endurance checks rather than mechanics challenges. According to community data, Conservative players reach the Billionaire Bunker mode roughly 23% more often than the average runner, which is the highest clear-rate delta of any class in the endgame content.
Hybrid Specialists: Middle Manager, Engineer, and Executive
Middle Manager: The Versatile All-Rounder
The Middle Manager sits in the Hybrid family with a flat +10% Damage and +5% across every other stat, which sounds modest on paper but compounds brutally over a full run. By the time you reach the floor 8 executive suites, a Middle Manager with a standard perk loadout is hitting roughly 22% harder than a Temp Worker with the same gear, and the +5% HP and Defense from the base modifier means you survive the longer fights that come with that damage output.
The Middle Manager's starting portfolio includes a Team Meeting AoE buff that grants +5% damage to all allies within 5 meters for 4 seconds, which is the only team-buffing ability on the base roster. In solo play, the buff still applies to yourself, and the cooldown of 18 seconds means you can maintain near-constant uptime once you learn the timing window.
Engineer: Ranged Specialist with Drone Pairing
The Engineer's +20% Ranged Damage and -10% Melee Damage modifier pushes the class firmly into the backline specialist role, and the signature Drone Companion ability spawns a floating stapler-drone that follows you for 12 seconds and fires 3-damage shots at any enemy you target. According to community data, the Engineer has the highest sustained damage-per-second of any class in the 1.0 roster, but only when the player commits to staying at range and kiting every encounter.
The Engineer's main weakness is the melee penalty, which means any enemy that gets inside your 3-meter bubble becomes an instant threat. Players who main Engineer report that the learning curve is steep in the first three floors but flattens out significantly by floor 5, once the staple dodge-into-shot timing becomes muscle memory.
Executive: The Endgame Unlock
The Executive archetype is locked behind a specific challenge — you need to clear the Corporate Ladder mode once with any other class, then defeat the Floor 10 Founder in the Billionaire Bunker mode on Hard difficulty. The +15% across all stats with no weakness makes the Executive the strongest base stat block in the game, and the signature Corner Office perk grants 1 free respec per run, which lets you pivot your build mid-run without losing Shareholder Value.
Community data on the Free Lives Discord suggests roughly 8% of active players have unlocked the Executive as of the 1.0 launch window, which puts the class firmly in the rare-tier category. For players chasing 100% completion, the Executive is the single hardest archetype to add to your collection.
How to Unlock All Archetypes: The Full Roster Path
The stick it to the stickman how to unlock all archetypes breakdown is straightforward because most of the roster is available from the first boot, but three classes require specific challenge runs to access. Below is the full unlock tree from the r/Stickittothestickman community repository, with the fastest path to 100% archetype completion:
| Archetype | Unlock Requirement | Estimated Time to Unlock |
|---|---|---|
| Temp Worker | Available from start | 0 minutes |
| Intern | Available from start | 0 minutes |
| Middle Manager | Reach Floor 3 once | 25-35 minutes |
| Caffeine Addict | Reach Floor 5 once | 45-60 minutes |
| Engineer | Defeat 1 boss with ranged-only attacks | 30-40 minutes |
| Sanitation Hazard | Defeat 5 enemies with hazard damage | 20-30 minutes |
| Ego Maniac | Take 500 damage in a single run without dying | 60-90 minutes |
| Conservative | Clear Corporate Ladder on Normal difficulty | 90-120 minutes |
| Executive | Clear Billionaire Bunker on Hard with any class | 180-240 minutes |
The unlock table above totals roughly 9 to 12 hours of playtime for a player who wants every class on the stick it to the stickman all playable characters roster, and that estimate is based on community data from the Free Lives Discord where multiple players have already posted their 100% unlock timestamps. The three secret character unlocks — the Executive, the Hyperactive Intern variant, and the Post-Retirement Manager — are gated behind even harder challenges, and the r/Stickittothestickman achievement-tracking threads put the secret roster at roughly 6 additional hours on top of the base 9 to 12.
For players chasing the best archetype picks on the roster, the general consensus from the r/Stickittothestickman tier list community data ranks the top three classes as Caffeine Addict for speedruns, Ego Maniac for boss damage, and Executive for endgame content, with the Middle Manager sitting comfortably in fourth as the most forgiving hybrid pick for first-time players.
Best Archetypes by Playstyle: Which Class to Pick
The stick it to the stickman best archetypes question does not have a single answer, because the right pick depends on the run you want to do. Community testing across both the Steam reviews and the Free Lives Discord server clusters the nine classes into four clear playstyle categories, and the table below maps each archetype to its ideal player profile:
| Playstyle | Top Pick | Runner-Up | Why It Works |
|---|---|---|---|
| Speedrun | Caffeine Addict | Intern | +25% Speed + chain dodges for fastest clear |
| Boss Damage | Ego Maniac | Sanitation Hazard | Hyper-armor lets you eat hits while charging Tier 3 combos |
| Beginner | Temp Worker | Middle Manager | Balanced stats + forgiving portfolios |
| Endgame | Executive | Conservative | +15% all stats + 1 free respec for late-game flex |
For most new players, the recommendation is to start as a Temp Worker through the first full Corporate Ladder clear, then switch to the Middle Manager for the second run to learn the +10% Damage stacking, then commit to either the Caffeine Addict or Ego Maniac for a third run depending on whether you prefer speed or tank play. That three-class progression is the path the majority of the r/Stickittothestickman community followed in the launch window, and it tends to produce the most well-rounded player by the time you reach the Billionaire Bunker content.
If you are still working your way through the challenging early floor supervisor encounters, the comprehensive boss guide and how to beat bosses survival tips guide pairs exceptionally well with the archetype selection advice and combat portfolio strategies outlined above.
Archetype Synergy With Combat Portfolios and Perks
Every archetype's signature perk changes how you build the rest of your combat portfolio, and ignoring that synergy is the single most common mistake new players make. The Temp Worker's balanced stats mean any perk works, but the Caffeine Addict's +25% Speed pushes the meta toward Lightweight Frame, Hyperactive Reflexes, and Triple Espresso — three perks that scale directly off the Speed modifier and would be wasted on a Conservative or Ego Maniac.
The three-tier move evolution system adds another layer because Tier 3 moves change behavior based on the archetype's stat block. The Tier 3 Chainsaw Slash, for example, deals 120 base damage on every class, but the Ego Maniac's +40% Hyper-Armor means you can charge the full 1.8-second windup without being interrupted, while the same move on a Caffeine Addict will get cancelled by any incoming hit during the windup. Community data confirms that the Chainsaw Slash is one of the highest-damage-per-second moves on the Ego Maniac and one of the most inconsistent on the Caffeine Addict, which is exactly the archetype-perk-move synergy the 1.0 update was balanced around.
The 1.0 update also added the Neurolink psychic power mastery system, which unlocks a fourth ability slot for every archetype and lets you stack a second signature perk. The strongest Neurolink combos reported by the Free Lives Discord community are Smoke Form + Titanium Cranium + Metal Arms for the Ego Maniac, which grants 4 seconds of invulnerability during a charged Tier 3 release, and Hyperactive Reflexes + Triple Espresso + Glass Cannon for the Caffeine Addict, which trades 20% HP for +30% damage on any chained-dodge finisher.
Final Takeaways on the Full Roster
The full stick it to the stickman archetypes list gives you nine core classes plus three secret variants, and every one of them plays distinctly enough that you can feel the difference within the first 30 seconds of a run. The role split into Agility, Power, and Hybrid families is clean enough that picking a class mostly comes down to which family matches your natural playstyle, and the unlock tree is forgiving enough that you will see most of the roster within 10 hours of play.
The single most common piece of advice from the r/Stickittothestickman community is to play every archetype at least once before committing to a main, because the cross-class transfer skills are real — learning the Ego Maniac's hyper-armor timing makes the Conservative's defensive playstyle feel natural, and learning the Caffeine Addict's chain-dodge timing makes the Intern's evasion playstyle feel boring by comparison. That cross-pollination is what the 1.0 update's archetype design was tuned for, and it is why the roster feels deeper than nine classes once you have actually played them all.
Frequently Asked Questions
Which archetype is the easiest for new players in Stick It to the Stickman?
The Temp Worker is the easiest archetype for new players because its balanced +0 stat modifiers mean no glaring weakness to manage during the first three floors. The class has roughly a 78% Floor Manager clear rate on a blind first run according to community data, and the starting combat portfolio is forgiving enough that you can learn the physics engine without dying to your own stat block.
How do I unlock the Executive archetype?
You need to clear the Billionaire Bunker mode on Hard difficulty with any other class first, then defeat the Floor 10 Founder boss without dying. The unlock takes roughly 3 to 4 hours for a player who already knows the Corporate Ladder route, and the Executive's +15% all stats with no weakness makes it the strongest base stat block on the entire roster.
What is the best build for the Caffeine Addict?
The fastest Caffeine Addict build stacks Hyperactive Reflexes, Triple Espresso, and Lightweight Frame to push the class past its already-fast +25% Speed baseline. The chain-dodge finisher combo, paired with the Triple Espresso buff, produces the fastest Corporate Ladder clear time on the roster at roughly 18 minutes and 42 seconds according to community timing data.
Is the Ego Maniac good for boss fights?
Yes, the Ego Maniac is one of the best boss-fight classes on the roster because the +40% Hyper-Armor modifier lets you charge the Tier 3 Ego Smash combo without being interrupted. The class has a 92% clear rate against the Head of Sanitation boss when the Tier 2 Rigid Posture to Tier 3 Ego Smash flow is executed cleanly, and the signature headbutt build is the most-discussed tank archetype in the 1.0 meta.
Can I switch archetypes mid-run?
No, archetype selection happens at the run start screen and cannot be changed once you enter a floor. The only way to change your class is to start a new run from the main menu, which is why most experienced players keep a save slot open for the three classes they main across the Corporate Ladder and Billionaire Bunker modes.